Aquabotix factory visit, and hand's on the HydroView
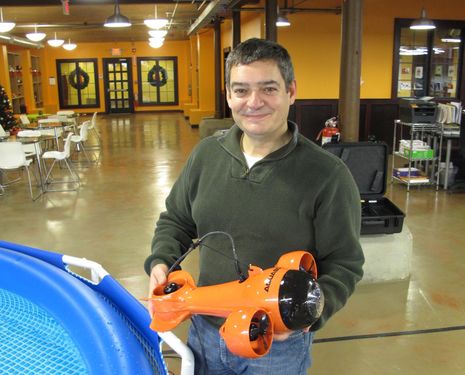
I believe that this gentleman -- Durval Tavares, the founder and president of Aquabotix -- earned that grin the hard way. It's no surprise that getting something as complex as a "remote controlled underwater camera vehicle" with an iPad interface to market would be a challenge, but when I visited the company HQ on Tuesday I was impressed with just how many details and disciplines are in play behind the scenes. I was also impressed with the cheerful, collaborative work environment Tavares and his team have created and I quite enjoyed taking my first HydroView driving lesson in the factory test pool (video example here)...
I first saw (and wrote about) the prototype HydroView at the Newport show in September 2011, then I tested the company's other (AquaLens) underwater cam last spring, and if it weren't for hurricane Sandy I would have tried the finally-shipping ROV in Fort Lauderdale. But I'm so glad that a Panbo business trip (good news coming, friends) took me near Aquabotix's Fall River, Massachusetts, home base...
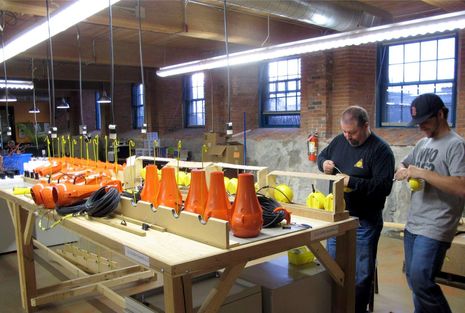
Aside from an eclectic tool shop -- picture drill press to 3D laser printer -- the entire Aquabotix staff works in one large space on the first floor of a huge old garment mill overlooking the Taunton River. In fact, in the top photo you can see a bit of the black tape line on the floor that separates the break area and clusters of the administration, engineering, and customer support desks from the product assembly area, as in "Be careful and no food beyond this line, please." The guys above (Boston Red Sox represented!) are working on yellow AquaLens heads but you can also see a line of orange ROV bodies. The black bits at far left are recently potted drive motors and the yellow to-be-shrunk wraps on the HydroView cables will eventually be connection points for the flotation bobbers that help keep the cable and ROV out of each other's way...
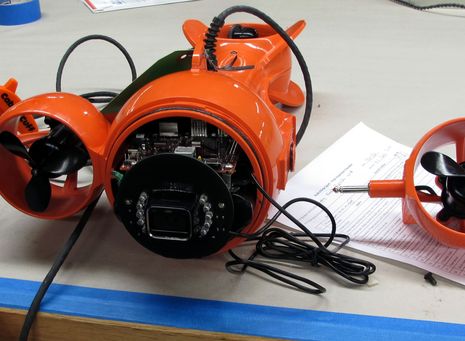
Above is a HydroView getting its final inspection (hence the checklist) and by the time I took the photo I understood some of the changes that evolved since the prototype. You can see, for instance, how the side thrusters are now modular, which makes the molding easier and also facilitates repair and/or replacement. I got a particular kick out of how Aquabotix is using a classic and still rugged 1/4-inch monaural "phono jack" to make the power connection between the ROV's serious internal circuitry and the (Swiss-built) prop motors. I believe that the jacks also help with alignment and structure, though I remember seeing my stereo-loving dad fooling with the same hardware in the 1950's...
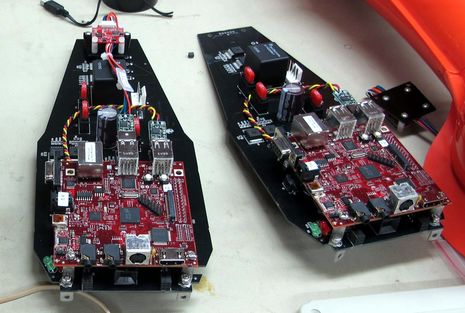
But my dad, technical though he was, would have a hard time comprehending what's possible with the HydroView circuit boards above. Heck, there's a full-on Linux PC in there, and one difference between the two assemblies in that the left-hand one has the optional Orientation Sensor (at top, delivering yaw, pitch, roll and true heading). There are also HydroView depth and water temp sensors already available. Now consider what it means when you have a ROV with many senses and fine motor control connected to an easily updated iPad app (or laptop program). When does an ROV become a robot?
Tavares was circumspect about features that might be added to the HyrdoView Sport or future models, but I think the current situation contributes to his grin and I can also report the following. While we were chatting by the pool and I noticed that the test HydroView within had come to life and reoriented itself with little bursts of prop power, a query to a software engineer in the back of the room came back "yeah, it should be pointed at the refrigerator now"...and it was...
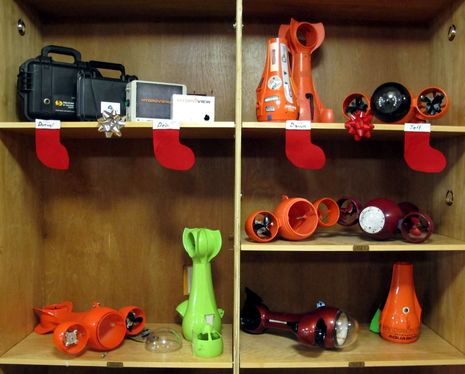
Above is the Hydroview history section you'll find at the entrance to Aquabotix. The narrow-waisted maroon model on the lowest shelf is the one first shown in 2011 and you can see how that design gained volume as the needed electronics and battery pack became realities. Somewhere along the development line the tail thruster turned ninety degrees too! But now there are scores of Hydroviews out in the field, some on yachts and some in the hands of professionals with a need to look around underwater without jumping in...
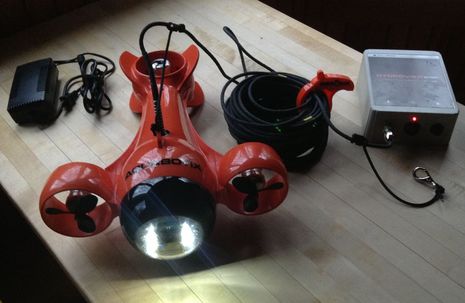
Finally, I'm happy to report that unit #134 is on loan to Panbo, as seen on my kitchen table above. Note the standalone design; the batteries in the ROV itself power the topside WiFi box through the 75-foot cable and thus you only need to plug the power brick into the box to recharge the batteries. In fact, I hardly needed even the two-page Quick Start Guide (though there is a thorough manual as well). Plug in the box, turn it on (the ROV reassuringly blinks its LED headlights as it boots up), find the Hydro134 hotspot with your iPad, fire up the app, and you're ready to fly.
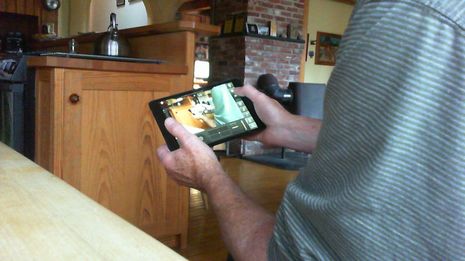
The Hydroview app is much more sophisticated than the prototype, or even the version illustrated on the Aquabotix site, but I'll detail all that after I test the ROV, hopefully in both the lake and harbor. But I did try getting the vehicle to snap still photos from the kitchen table and thus captured this "endless" view below. The technology makes me grin like Durval Tavares though without having to do all the development work first.

 Share
Share
A high tech company starting up in a small and somewhat beaten down mill city naturally got some attention from the business press. I particularly enjoyed this piece: http://tinyurl.com/southcoasttoday-aquabotix